Monday, June 22, 2015

Balsamic Roasted whole Chicken legs - in the Grill Pan


I bought this wonderchef granite grill pan sometime back and never used it. Over the weekend, I had whole Chicken legs sitting in my freezer and decided to use the grill pan. This is an extremely easy recipe, all I did was marinated the Chicken legs for an hour and roasted them on my grill pan and not in the Oven. It procedure is extremely simple and the end result tastes awesome. The Onion and Bell Pepper rings, I added run time, they got a little cooked in the marinade and tasted great too.

Balsamic Vinegar is the base of this marinade; it looks like red wine, adds an amazingly rich taste and texture to the dish.

Ingredients:

Whole Chicken Legs – 2
Balsamic Vinegar - ½ cup
Extra Virgin Olive Oil – 2 tbsps
Dried Rosemary – 1 tsp
Dried Mixed Herbs – 1 tsp
Garlic – 2 medium cloves – crushed
Ginger Powder – 1/4th tsp
Lime Juice – ¼ the juice of a Lime
Chili Paprika – ½ tsp
Salt to taste
Pepper to taste
Sliced Onion and Bell Pepper rings - optional

Marination:

Wash the Chicken Legs thoroughly and pat dry. I used frozen one’s, let them completely defrost, pat dry.

In a bowl, mix all the ingredients and marinate the Chicken legs in the marinade in the Refrigerator for an hour or more (I did for an hour).

Method:

Heat the Grill Pan and place the Chicken Legs in them over medium heat, I cooked them for about 7-8 minutes on each side.


Add more EVOO if needed.

Once one side is cooked, turn and cook the other side.

Add the Onion and Bell Pepper rings, sprinkle some more salt and pepper.


Run the knife through the thigh of the Chicken, if the juice runs clear, the meat is done.

Give it standing time for 5-7 minutes before you serve, if cut immediately, the juices will run out and the meat will become extremely dry.


Friday, June 19, 2015

Basanti Pulao - a traditional Bengali Sweet Pulao


I have been intending to post the recipe of my Basanti Pulao for close to 2 years now. Sometime back, I actually took pictures of the step by step process and was still not able to post it for reasons unknown. Basanti Pulao and Kosha Mangsho (slow cooked spicy Mutton curry) is a match made in heaven and is an absolute regular at my home. We celebrate the craziest of occasions with this menu, even occasions like both of us working from home on a given day! The sweetness of the pulao compliments the hot and spicy mutton curry and they just have to be tried together.

The Rice traditionally used for this recipe is Gobindobhog and one should never deviate from this tradition. If you do, you will still make a pulao, but not the Godly Basanti Pulao! I have lived in Maharashtra for 8 years and always carried my share of Gobindobhog from back home; however, I did find a variant of this which I used when I ran out of Gobindobhog, Ambemohar! A dear friend from work once introduced me to Ambemohar, and I agree it is a lost sibling of the Bengali Gobindobhog!

I usually assemble the dish and put it in the Microwave Oven for the final cooking bit. Though the last time I made it in the Pressure and it came out just perfect!

Ingredients:
Gobindobhog / Ambemohar Rice – 1 cup
Cashews – a handful
Raisins – a handful
Green Cardamom – 2-3
Cinnamon – 1” stick
Cloves – 2-3
Bay Leaf – 2
Grated Ginger - 1 tsp
Nutmeg Powder – ¼ th tsp
Frozen Green Peas – ½ cup (optional)
Sugar – depending on how sweet you want the Pulao to be – I add about 7 tsps, as this is essentially a sweet pulao with a little bit of salt to balance out the taste.
Salt– to balance
Turmeric Powder – ½ tsp (traditionally soaked Saffron is used for the color, I use Turmeric Powder for the yellow hue as Saffron is not always handy in my Kitchen)
A small slice of Lime (if cooking in the Microwave Oven)
Ghee / Clarified Butter – 2 tbsp
Method:
Wash the Rice till the water runs clear, drain and set aside.
Heat Clarified Butter / Ghee in a Pan, drop the whole garam masalas (cinnamon, cardamom, cloves and bay leaves) in it, let them sizzle for a while. Add the cashews and raisins and roast them till golden, do not roast too much and burn them.


Now add the Rice to the Pan and keep stirring so that every grain gets coated in Ghee.
Add the grated ginger and keep stirring till the raw ginger smell is gone.
Stir in the frozen Peas.


Add the Sugar, Salt, Turmeric Powder and Nutmeg Powder and mix well.
Do a taste test to see if the sugar and salt are okay, add more if needed, remember this is mishit pulao so it will be a LOT sweeter than other Rice dishes and Salt will only balance out the taste.


Now for the final bit there are two methods:

Pressure Cooker: Transfer the contents of the Pan into a Pressure Cooker, Add 2 cups of Water (double the quantity of Rice) and cook for one whistle, let the pressure completely go down on its own, and then open the lid.

Microwave Oven: Transfer the contents into a Microwave safe bowl, add 2 cups of water, add a few drops of lime juice, cover with a cling film, and Microwave on high for 20 minutes. Unwrap the cling film, and serve the Basanti Pulao with the Kosha Mangsho – slow cooked spicy Mutton Curry!


Tuesday, June 16, 2015

Chire Bhaja - ‘Crispy Flattened Rice with Sweet Peas and Peanuts'

So I made the simple Bengali Chire Bhaja - ‘Crispy flattened rice with sweet peas and peanuts’ as a snack last evening and we both loved it. As a kid I never enjoyed this dish, I guess that is because, wherever I ate, they either added peanuts like misers or the Chire was not as kurmure (crispy) as I like. There are different variants of this snack in different households, some add peas, some don’t, some add sugar, and some don’t. This recipe requires quite a bit of cooking oil as the flattened rice absorbs all the oil you can pour and very fast at that, hence keep the Oil to minimum. The ingredients listed will make the snack for three people, I wanted to make for two, but it was more than enough for the two of us.


Ingredients to make Chire Bhaja:

Chire Bhaja/Flattened Rice – 2 cups
Cooking Oil – 2 tbsps
Raw Peanuts – ½ cup
Shelled Green Peas – ½ cup – I used the frozen kind
Whole Dry Red Chilli – 2
Red Chilli Powder – ½ tsp (to your taste)
Salt to taste
Black Pepper to taste
Sugar to balance


Method:

Heat 1 tbsp of oil in a Kadhai and fry the raw peanuts in the oil, add a pinch of salt, keep stirring, fry them till the peanuts are done. The skin of the peanuts will turn a dark color indicating that they are done. Once done scoop them out and drain them on a paper towel.

To the same oil, add the green peas and fry them for a while with a pinch of salt. The frozen green peas take very less time to get done compared to the Peanuts. Scoop them out and drain them on a paper towel too.,

Add the rest of the Oil to the Kadhai. Once the Oil is hot, tear the two whole dried red chillies and add to this oil, let it sizzle. This process flavors the oil.

Stir in the 2 cups of flattened rice, keep the heat to medium while frying the flattened rice. Keep stirring otherwise it will burn the rice at the bottom and it will not taste good. The flattened rice will absorb all the oil, keep stirring.

Add the Salt, Sugar, Red Chili Powder and Black Pepper Powder and keep stirring. Once desired crispiness is reached, add the Peanuts and Peas to it and mix thoroughly. Be very careful while doing a taste test as all the ingredients tend to get extremely hot and can burn your tongue like never before.


Serve with Chai - Tea of your choice..heaven!

Tuesday, December 16, 2014

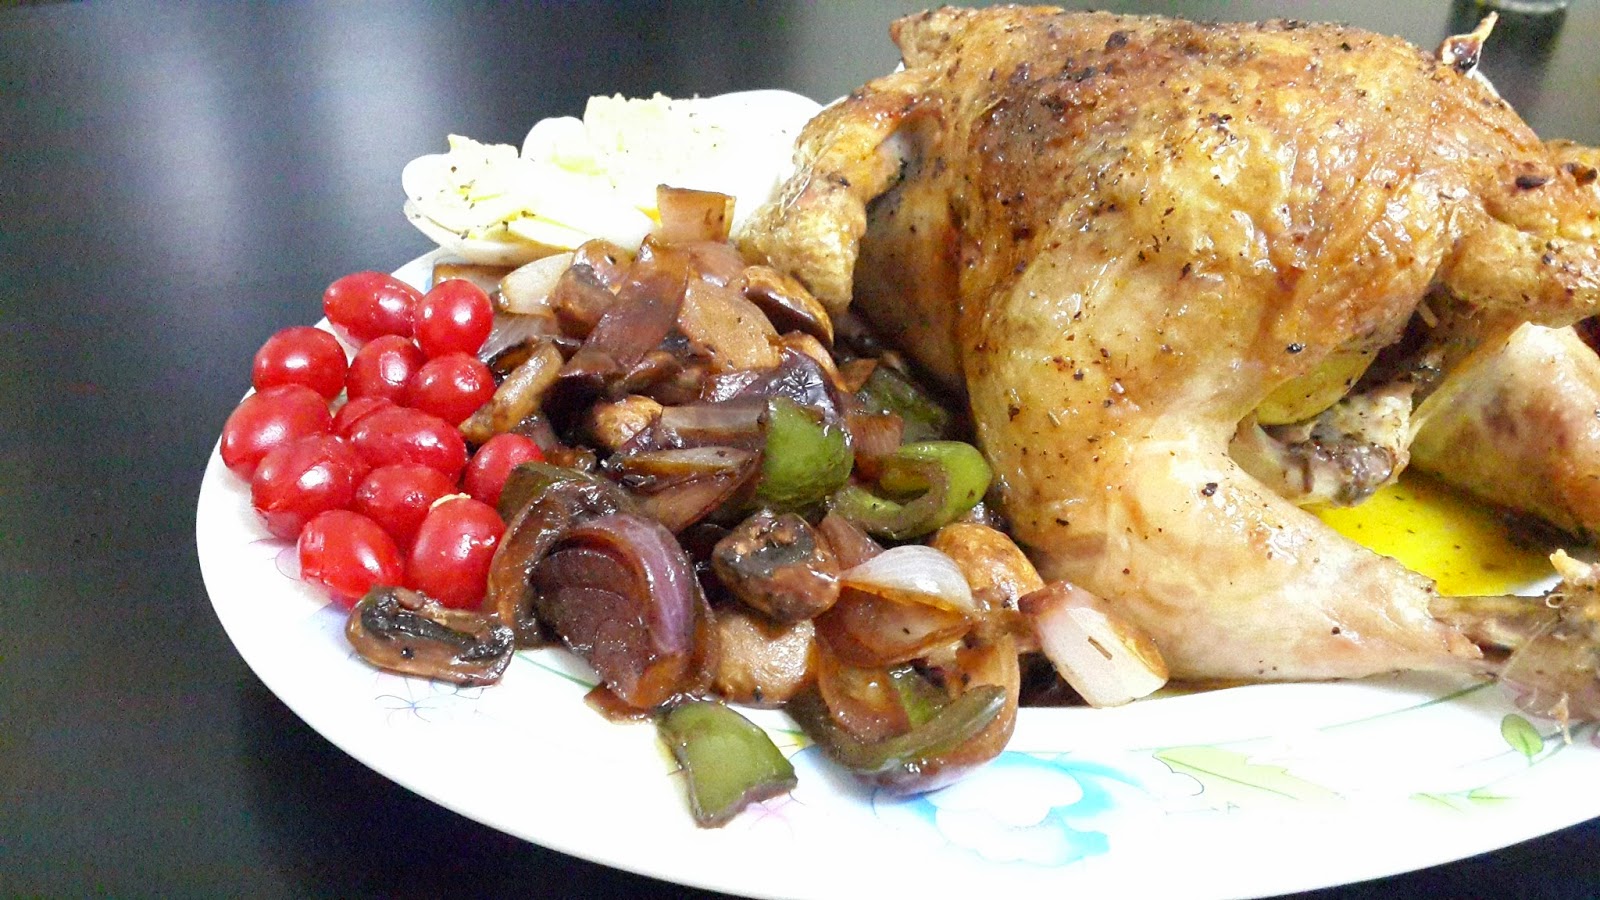
Roasting a whole Chicken for Thanksgiving

I have watched the F.R.I.E.N.D.S series rather late in life. Exactly a month before my wedding, I was diagnosed with Chicken Pox and was confined at home, I started recovering after the initial lethal attack of the disgusting virus and was still covered in extremely itchy, always-exploding blisters and did not have much to do. I was getting dead-fed up of scratching the blisters and dreading the mark would never go away, at least not in a month’s time; that is when I looked up my hard drives and discovered I had the entire series of F.R.I.E.N.D.S copied from some friend at work. I started watching them and got immensely addicted, so much so that I extended my sick leave by a few days to finish it off. I have not watched any other sitcom which spanned 10 seamless years and had millions crying when it finally ended. Even today, there are so many speculations out there, there is going to be a F.R.I.E.N.D.S movie, there should be a bonus episode and what not but alas, I think it really has ended.


I was always in awe of the thanksgiving episodes; there was one for almost all seasons. I loved how Monica would be in competition with her own self, to make another fabulous meal, better than the year before, how Joey wore giant pants to eat the entire Turkey, how Chandler ended up blabbering out that he loved Mon while she had her head inside the Turkey, Phoebe’s famous wish ‘Oh, yeah, happy needless-turkey-murder day’, how Ross and Monica would scream out each other’s secrets to their Parents, how Rachel ended up adding Beef to her Trifle, in no particular order; I love them all, equally. Above all I loved the fact that they chose to spend time with each other, at home, the elaborate meals, the silly bouts and the crazy tête-à-têtes, I loved them all.

Since then I have wished to prepare a Turkey myself, but neither is Turkey easily available here nor do I have an Oven which can fit-in a Turkey, not to forget, it is just the two of us and with no Joey, it will impossible to finish! On Nov 27th, I was working from home and did not realize till late that it was Thanksgiving; when I did; I ran out and got a whole Chicken with skin which weighed about 1.2 Kgs (2.65 lbs.) and roasted it with some vegetables, just the way I wanted. A and I thoroughly enjoyed the me
al. I made a side of Sautéed Mushrooms as well, which I will post in a later post.


Here is what you will need to roast the whole Chicken:

Chicken – whole with skin – weighing about 1-1.2 kgs – washed and patted absolutely dry. Make sure the Chicken is well thawed; take it out from the freezer at least an hour before you start to prep it
Garlic:
-        4 cloves – minced (to go into the butter)
-        an entire head of Garlic, cut through the center (to go inside the Chicken)
-        an entire pod of Garlic, unpeeled and separated, to go with the vegetables
Unsalted Butter – 50 gms – at room temperature (not melted)
Mixed Herbs – 2 tsps (I used the dry variety, if you can fresh herbs, even better)
Lemon – 1 – halved
Salt to taste
Pepper to taste
Baby Potatoes – 5-6, scrubbed and cut into halves (unpeeled)
Onions – 2 – halved
Carrot – 1 – scrubbed and cut into chunks
Sweet Potato – 1 – scrubbed and cut into chunks
Extra Virgin Olive Oil – 2 tbsp
Some Kitchen twine (I did not have any, I used regular thread)


Process:

Pre-heat the Oven to 200C

Drizzle some EVOO in a large roasting dish and add the baby potatoes, carrots, onions, carrots, garlic cloves and sweet potatoes, season them with salt and pepper, add a dash of mixed herbs, mix well and keep

Take the unsalted butter, add the mixed herbs, minced garlic, and season with salt and pepper, use a fork to mix it well and keep

Place the Chicken on a clean surface or on Kitchen towels, using a butter knife (I just used my hand), separate (do not cut through) the skin and the breast to have a hollow area and stuff 3/4th of the herbed Butter inside, using the fingers over the skin stuff it in and smear it around, smear the rest of the Butter on top of the Chicken

Stuff the halved whole garlic and lemon into the big cavity of the Chicken

Use a Kitchen twine to tie the legs close to each other so that the stuffing in the cavity does not fall apart while roasting

Place the Chicken on the roasting dish over the vegetables and tuck the wings under the Chicken


Bake the Chicken for about an hour at 200C (if you have a meat thermometer, you can insert it in the thigh and checked if it has reached a temperature of about 75C, poultry should be cooked through if it has)


Let it rest for at least 10-15 minutes, before you carve it as if you try to slice it right then, all the juices will fall off and meat will dry out


I did not carve it beforehand, as it was just the two of us for dinner, I served it with some hard boiled eggs, a sautéed mushrooms side, some sweet red cherries and some Breezers – it was our best thanksgiving ever!


Wednesday, December 10, 2014

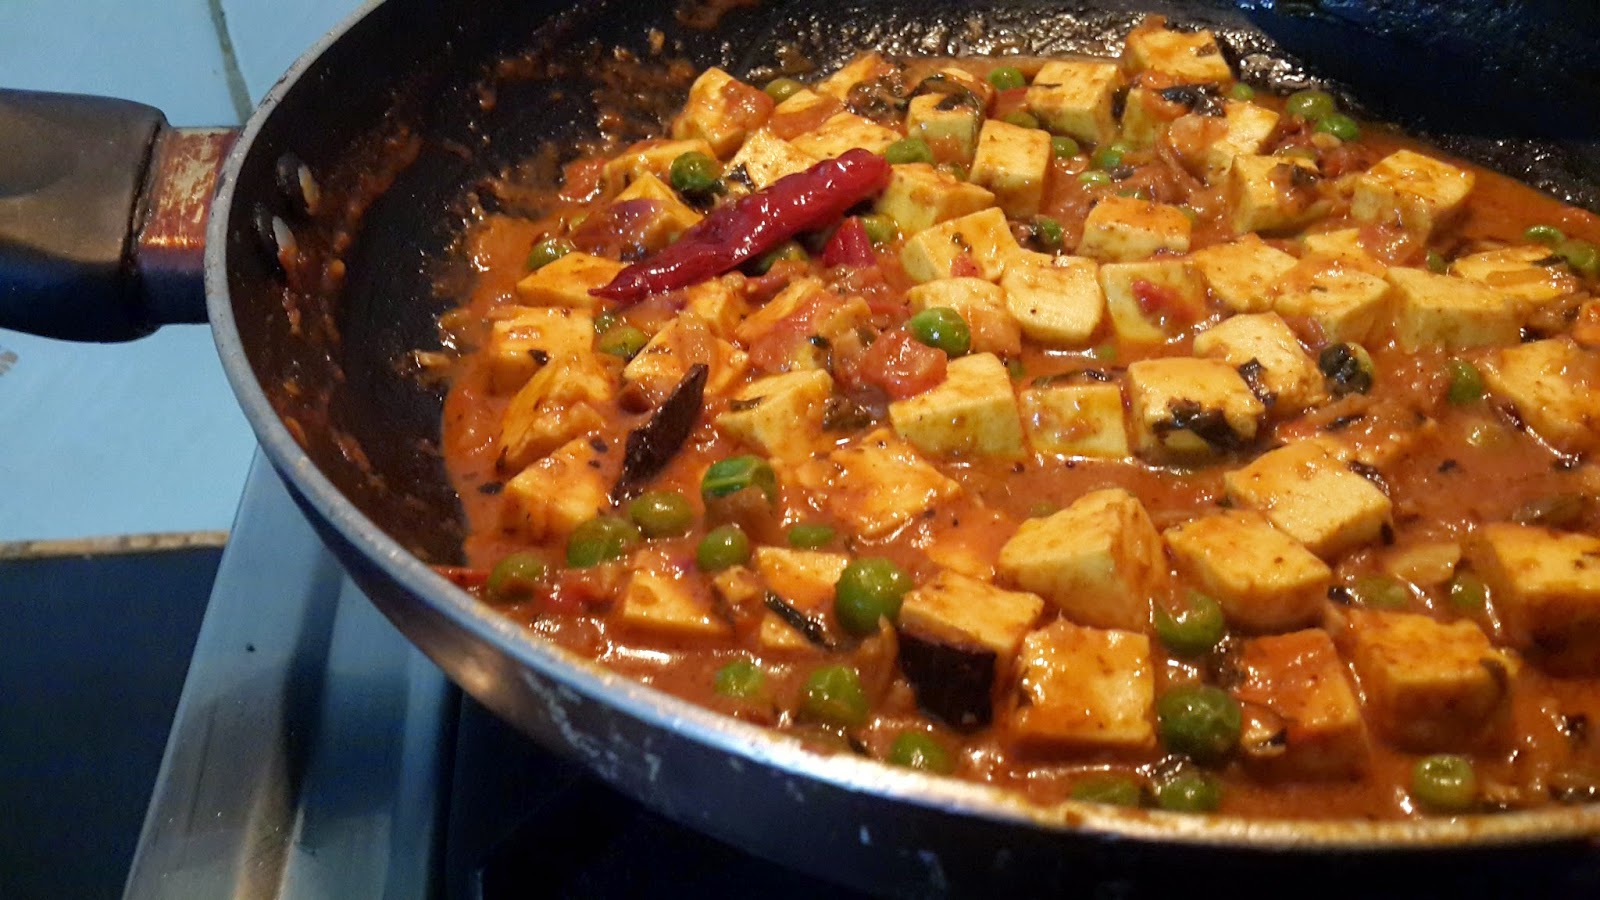
Paneer Butter Masala

With the landmark Birthday and all the hullabaloo just gone by, I was contemplating which recipe to post next from the stockpile and then came across a rather overwhelming comment from a friend (which I had missed earlier) and I knew what to post. The urge to eat vegetarian food is relatively new for me, though A is completely in awe with good Paneer preparations; I was never very fond of them. I am rather choosy about the Paneer I eat; totally love the ones they serve at The Great Kabab Factory, Radisson, when eating at home, I only prefer getting fresh Paneer from a Dairy. On those rare occasions when I got them, A was the one who prepared the dish. After we moved to this part of the Country, I was told that Milky Mist Paneer (from Nandini Dairy – the most famous Dairy in Bangalore) was the best available here.


The other day when I was out grocery shopping, I found the same Paneer and got a pack, quite reluctantly. I thought I will ask my Cook to make something, then changed my mind and thought of making some Paneer Butter Masala, a very comforting Indian dish wish Cottage Cheese.

Here is what you will need to make Paneer Butter Masala:
Serves – 4

·        Paneer/Cottage Cheese : 200 gms
·        Cooking Oil – 1 tbsp
·        Whole Dry Red Chilis – 2
·        Cinnamon – 1” stick
·        Green Cardamom – 2
·        Cloves – 2 to 3
·        Unsalted Butter 1 tbsp - (If using the salted version, go low on the loose salt added to the dish)
·        Onion – chopped – 1 large
·        Ginger and Garlic paste – 1tsp
·        Milk – 1 cup
·        Tomatoes – chopped – 2 medium
·        Chili Powder – 1 tsp
·        Coriander Powder – 1 tsp
·        Cumin Powder – 1 tsp
·        Garam Masala Powder – 1 tsp
·        Kasuri Methi – 1 tbsp
·        Green Peas – ½ cup - optional
·        Salt to taste
·        Sugar to balance


How to prepare Paneer Butter Masala:

·        Cut the Paneer out into small cubes and set aside
·        Pour cooking oil into a large skillet and add the butter, let the butter slowly melt as the oil heats up
·        Add the whole dry red chilies, cinnamon, cardamom and cloves and let them sizzle
·        Add the chopped onions and add a pinch of sugar (for the onions to caramelize faster), sauté till the onions get some color
·        Add the ginger-garlic paste and sauté for a few minutes
·        Add the dry masalas and keep stirring
·        Add the tomatoes and keep stirring till the tomatoes are all mashed up, I used my masher at this point to mash it all up


·        Add the kasuri methi and mix well (looking at the pic, I feel I added kasuri methi before I used the masher, do it the way you want!)
·        Pour the milk in and bring the gravy to a boil
·        Add the cubed paneer pieces and the green peas and give it a stir, let it simmer away for 5-7 minutes
·        Adjust salt and sugar
·        Once desired consistency is reached, turn off the stove and serve hot with Phulkas


Thursday, December 4, 2014

Spanish Chicken Rice

Slowly getting into the groove of posting most of what is happening in my Kitchen (again) and loving every bit of it. Happy to be back :) :)

The recipe I am about to share today is a hearty Chicken Rice recipe, people from different parts of the world make their own version of Chicken Rice. This recipe is very close to the Spanish Chicken Paella, however it does not consist of the traditional Chorizo or Saffron in it hence I will call it Spanish Chicken Rice. One can add Prawns, Mussels and some Chorizo of course. It can also be topped with some small Green Olives.


Here is what you will need to make Spanish Chicken Rice:
Serves – 4
·        Chicken – 400 gms (boneless or with bone – I used Chicken pieces with bones as I prefer the dark meat more)
·        Vegetable Oil – 3 tbsp
·        Garlic – 5-6 cloves - minced
·        Onions – 2 medium – chopped into chunks
·        Bell Pepper – Green, Yellow and Red – 1/3 Cup each
·        Granulated Garlic – 1 tsp
·        Paprika – 1 tbsp
·        Tomatoes – 2 small – chopped
·        Long grained white Rice – 2 cups (Ideal is Paella Rice, but this is not authentic Paella and long grained Rice is what I had)
·        Chicken stock – 4 cups
·        Green Peas – frozen – ½ cup
·        Salt to taste
·        Pepper to taste


How to make Spanish Chicken Rice:

·        In a large Skillet, heat Vegetable Oil
·        Toss the Chicken pieces in and season with some Salt and Pepper, cook all sides till color develops
·        Add the minced Garlic, Onions and Peppers and cook for a few minutes, season with a dash of Salt and Pepper again, cook for 6-7 minutes till they start to soften up
·        Add the washed long grained white Rice and keep stirring, add the paprika and granulated Garlic and mix well, cook for about a minute or two
·        Stir the Tomatoes in and add the Chicken stock
·        Season it with a final touch of Salt and Pepper and bring it to a boil, once it stars boiling, lower the heat to low and cover, let it cook for 25 minutes


·        After 25 minutes, uncover and fluff it up with a fork (do not use a soon, that will mess up the Rice)
·        Add the frozen Green Peas and gently mix, even if they are not fully defrosted, they will. Turn off the heat and cover. In another 10 minutes it should be ready to dig in


This is yet another one pot meal to die for. Make it on week nights for the Family, even for those unplanned get-togethers it is a life savior!

Wednesday, December 3, 2014

My version of Kerala style Sukha Prawns

All right, it’s been aeons that I have blogged. Life has been a complete roller coaster for the past many months now and though I have been cooking on and off, I have never had the temperament to update the recipe. Now that things are finally settling down and I have the time and energy to try out new things, take pictures and post recipes, I have a series of pending posts. This post is for a dear friend ‘S’, sitting in a distant land (we share pictures of stuff we prepare all the time), who saw the picture (thanks to Viber) of a certain Prawn preparation and asked for the recipe.

Prawns are an absolute favorite at my place. They are flavorful, delectable, takes little time to cook and everyone loves them. As I moved to Southern India a couple of months back, a desire for trying the ingredients and techniques used here has amplified in me. Hence I present to you my version of Kerala style Sukha Prawns.


Here is what you will need to make Sukha Prawns:

·        Prawns – cleaned and deveined – 250-300 gms (keeping the tales on or off is up to you)
·        Cooking Oil – 2-3 tbsps
·        Cumin seeds – ½ tsp
·        Onion – 1 large – chopped
·        Garlic – 4-5 cloves - minced
·        Green Chili – 2-3 – whole – slit
·        Lime juice – 1 tsp
·        Desiccated Coconut – 3 tbsps (or as per your taste)
·        Turmeric Powder – ½ tsp
·        Cumin Powder – 1 tsp
·        Red Chili Powder – 1tsp
·        Tamarind water – 4 tbsp
·        Salt to taste
·        Sugar to balance (you may or may not want to add this, the coconut is already sweet)
·        Pepper – freshly ground – as much as you can stand
·        Coriander leaves – a handful – chopped


Here is the method to make my version of Sukha Prawns:

·        Heat the Oil in a Pan
·        Add the Cumin seeds and let them splutter
·        Add the minced Garlic, slit Green Chilies and the Onion – sauté for a while and let the Onions get some color
·        Add the Prawns in and stir (Prawns take very less time to cook so be careful from here, over cooking will leave the Prawns chewy and rubbery – here on the dish should be done in approximately 6-7 mins)
·        Add Turmeric Powder, Cumin Powder, Red Chili Powder, Salt, Pepper and Sugar and stir for a minute
·        Add the desiccated Coconut and mix well (I used store bought desiccated Coconut – this takes lesser time to cook as it is already dry, freshly desiccated Coconut should be added once the Onions get some color, before adding the Prawns and cooked till about 50% of the moisture has dried up, then the Prawns should be added)
·        Add the Lime Juice and Tamarind water and crank the heat up to high so that the liquids evaporate fast, this is a dry preparation and is best served as a Starter. The Tamarind and the Lime juice will give this dish an overwhelming tangy touch
·        Add the chopped Coriander and mix well
·        Once the desired consistency is reached, check the seasoning and add Salt and Pepper if needed.
·        Serve hot, it is a great Starter and your guests will love it


I served this to my Brother and ‘A’ twice and they totally loved it. I could not get enough of the dry gravy of this dish; it is out of this world. Make this when you have guests, make it when you want to pamper yourself, make it anyway!